Nativity Shadow Box - Christmas SVG: A Guide to Flawless Holiday Crafting
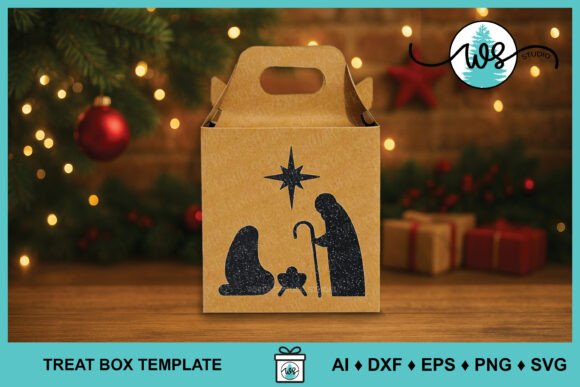
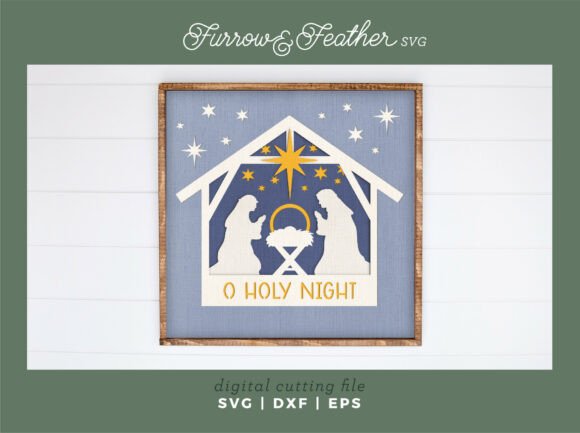
There is a distinct warmth that comes from creating handmade holiday decor, especially when the project centers on the true meaning of the season. The Nativity Shadow Box - Christmas SVG offers a beautiful opportunity to craft a timeless piece featuring baby Jesus in a crib, surrounded by Mary, Joseph, and twinkling stars, all anchored by the phrase "O Holy Night." However, turning a digital file into a stunning 3D display requires more than just pressing a button on your cutting machine. Many crafters rush into the process without understanding how layering, material choice, and scaling impact the final result, often leading to frustration or a finished product that lacks the depth it deserves.
Understanding the Design and Its Potential
This specific design is engineered to create depth through layered cardstock, transforming a flat image into a dimensional shadow box. The standard dimensions are set for an 8×8" finish, fitting comfortably within standard 8.5 x 11" cardstock sheets. This makes it an efficient use of materials for both hobbyists and small business owners looking to produce inventory. The file is optimized for popular machines like the Cricut Joy Xtra and Silhouette Portrait, ensuring compatibility for most home studios.
The appeal of this Nativity Shadow Box - Christmas SVG lies in its versatility. You can customize the cardstock colors to match your existing Christmas decor, whether you prefer traditional reds and greens, modern neutrals, or metallic accents. The numbered layers simplify the assembly process, guiding you through the stacking order to ensure the scene looks cohesive. Yet, the ease of the file does not guarantee a perfect outcome if fundamental crafting principles are overlooked.
Common Mistakes That Compromise Your Project
One of the most frequent errors crafters make is ignoring the relationship between file scalability and detail retention. While this design is scalable to any size, there is a practical limit to how small you can go before the intricate details—such as the facial features of the holy family or the fine points of the stars—become indistinct. Downsizing too aggressively can result in a blurry cut where the lines merge, ruining the delicate aesthetic of the nativity scene.
Example: If you attempt to resize the 8×8" design down to a 4×4" frame for a small gift tag, the text "O Holy Night" may become illegible, and the figures might lose their definition. The cutting blade may struggle to navigate tight corners at such a reduced scale, leading to jagged edges or incomplete cuts.
Another significant oversight involves the adhesive application, particularly regarding the large star mentioned in the instructions. The design notes that you will need glue to adhere the large star to layer two. Beginners often apply glue directly to the visible face of the star or use an adhesive that bleeds through thin cardstock. This creates unsightly stains that distract from the clean lines of the design. Furthermore, using the wrong type of glue can cause warping, making the layers uneven and preventing the shadow box from sitting flush against the backing.
Material Selection and Color Strategy
The choice of cardstock is critical for the structural integrity and visual impact of your shadow box. Using paper that is too thin will cause the layers to sag over time, while paper that is too thick may not fit within the designated 8×8" frame or could jam your cutting machine. Standard 65 lb to 80 lb cardstock is typically the sweet spot for this project.
Color coordination is another area where mistakes happen. It is tempting to mix random scraps of leftover paper, but this can make the design look chaotic rather than intentional. Since the design features specific elements like Mary, Joseph, and baby Jesus, consider using a color palette that enhances the focal point. For instance, using a deep navy background with gold foil accents for the stars can create a striking contrast that highlights the central figures. Conversely, using too many bright, competing colors can make the scene visually noisy and difficult to interpret.
Practical Steps for a Professional Finish
To avoid these pitfalls and achieve a museum-quality finish, follow these corrective steps during your workflow:
- Test Cut Before Finalizing: Always perform a test cut on a scrap piece of the exact cardstock you intend to use. Check the alignment of the smallest details. If the text or fine lines appear broken, increase the size slightly or adjust your blade pressure settings.
- Respect the Scale Limits: Stick close to the original 8×8" dimensions unless you have verified that the smaller version retains clarity. Remember that the design fits standard 8.5 x 11" cardstock; pushing beyond this ratio requires careful planning to ensure you aren't wasting expensive material on failed cuts.
- Use the Right Adhesive: For adhering the large star to layer two, use a foam adhesive dot or a glue stick applied sparingly to the back of the star. Avoid liquid glue near the edges to prevent seepage. Foam dots also add a subtle extra dimension that enhances the shadow effect.
- Follow the Numbered Layers: The file includes numbered layers for a reason. Do not skip ahead or guess the order. Assemble the box from the back layer forward to ensure proper spacing. Misaligned layers will ruin the perspective of the nativity scene.
Evaluating Value and Compatibility
Before purchasing or downloading the Nativity Shadow Box - Christmas SVG, verify that your software and hardware can handle the file format. While compatible with Cricut Joy Xtra and Silhouette Portrait, ensure your design software (like Cricut Design Space or Silhouette Studio) is updated to render the layers correctly. Some older versions of software may flatten complex layers, stripping away the numbering system that aids assembly.
Additionally, consider the cost of materials relative to the output. If you are producing these for a small business, calculate the cost of cardstock, frames, and labor per unit. The efficiency of this design comes from its ability to maximize an 8.5 x 11" sheet, but waste increases if you frequently resize incorrectly or make cutting errors. Planning your layout to minimize off-cuts will improve your overall profitability and reduce environmental waste.
Final Thoughts on Craftsmanship
Crafting a Nativity Shadow Box is about more than just following a template; it is about honoring the story through precision and care. By avoiding common scaling errors, selecting appropriate materials, and paying attention to the specific assembly instructions—like gluing the star to the correct layer—you ensure the final product is both beautiful and durable. Whether you are a beginner exploring your first cutting file or a professional expanding your holiday catalog, taking the time to understand the nuances of this design will yield results that truly capture the spirit of "O Holy Night."
For those looking to expand their creative horizons, exploring other delightful Christmas cutting files can provide further inspiration. However, mastering the fundamentals with projects like this one lays the groundwork for consistent success in all your future crafting endeavors. Happy crafting.